
[ad_1]
Is your ice maker giving you a headache? Don’t let it put a damper on your day, especially when your ice maker is not working. In this comprehensive guide, we’ll walk you through the most common ice maker problems and provide step-by-step solutions to get your ice maker up and running again. Say goodbye to frustration and hello to perfectly chilled beverages.
Key Takeaways
- Identify common ice maker problems and their causes/solutions.
- Monitor freezer temperatures, replace filters regularly, clean the ice bin to prevent issues.
- Seek professional assistance for persistent issues or complex repairs.
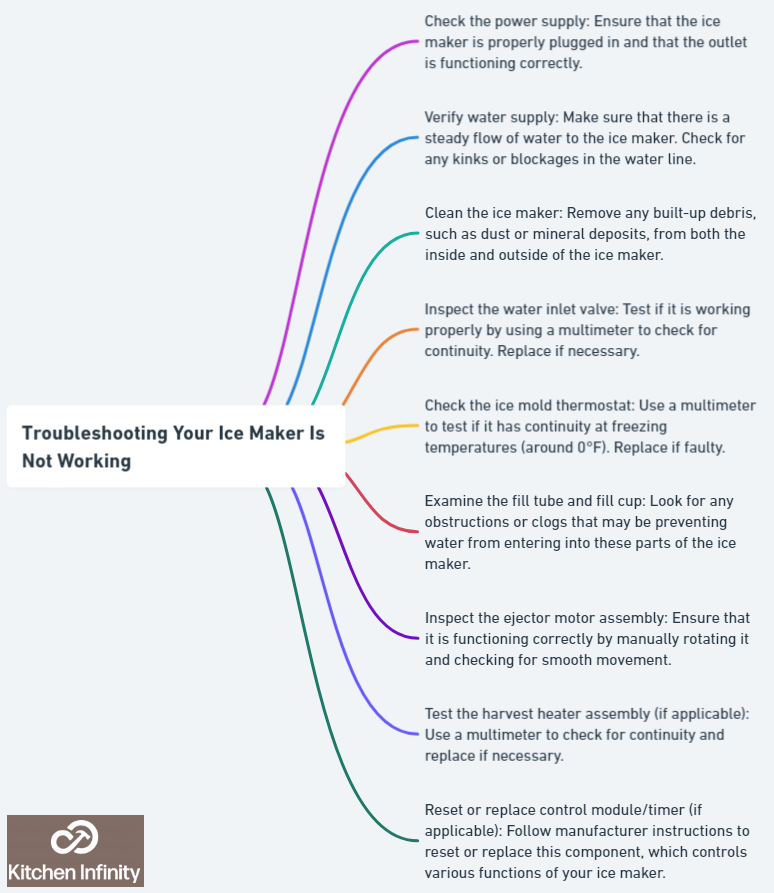
Identifying Common Ice Maker Problems
Let’s begin by taking a look at the usual suspects when it comes to ice maker malfunctions. From not producing ice to odd-tasting cubes, these issues can quickly put a damper on your day.
The subsequent sections will elaborate on the causes and solutions for each of these prevalent ice maker problems.
GE Ice Maker Not Working
If your GE ice maker is experiencing issues and you find yourself facing the frustrating problem of “GE ice maker not working,” don’t worry; there are several potential solutions to get your ice maker back in order. These appliances can encounter various problems, such as a lack of ice production, slow ice output, or ice that is misshapen or tastes unusual. Before calling for professional assistance, try troubleshooting common issues by checking the water supply, ensuring proper temperature settings, and examining the ice maker components
Not Making Ice
Perhaps the most frustrating issue is when your ice maker simply isn’t making ice. This can stem from a variety of causes, such as a malfunctioning water inlet valve, a frozen water line, or incorrect refrigerator control settings. If your ice maker is cycling but not producing ice, it’s worth checking for a frozen fill tube in the freezer or ice maker compartment. Adjusting the freezer’s thermostat to 0°F (-18°C) can also help promote optimal ice production.
Verify an adequate water supply by dispensing some water from the water dispenser or inspecting the fridge’s water supply. If you find that the water supply cut-off valve is shut, simply open it to restore the water supply to your fridge and ice maker. Always unplug your refrigerator before you start troubleshooting. Additionally, make sure to turn off the water supply line as well.
Small or Hollow Ice Cubes
Small or hollow ice cubes can be annoying, as they often melt too quickly. This issue is often caused by insufficient water flow, which prevents the ice tray from filling completely. To resolve this issue, ensure your water filter is up to date, check the fridge water line, and confirm that your refrigerator and ice maker are level.
It’s also crucial to maintain the appropriate water pressure for your ice maker, which should be between 20 and 120 pounds per square inch (PSI). If the water pressure is too low, your ice maker may struggle to produce an adequate amount of ice. Adjusting the water flow control can help regulate the amount of water that flows into the ice maker, ensuring proper ice cube formation.
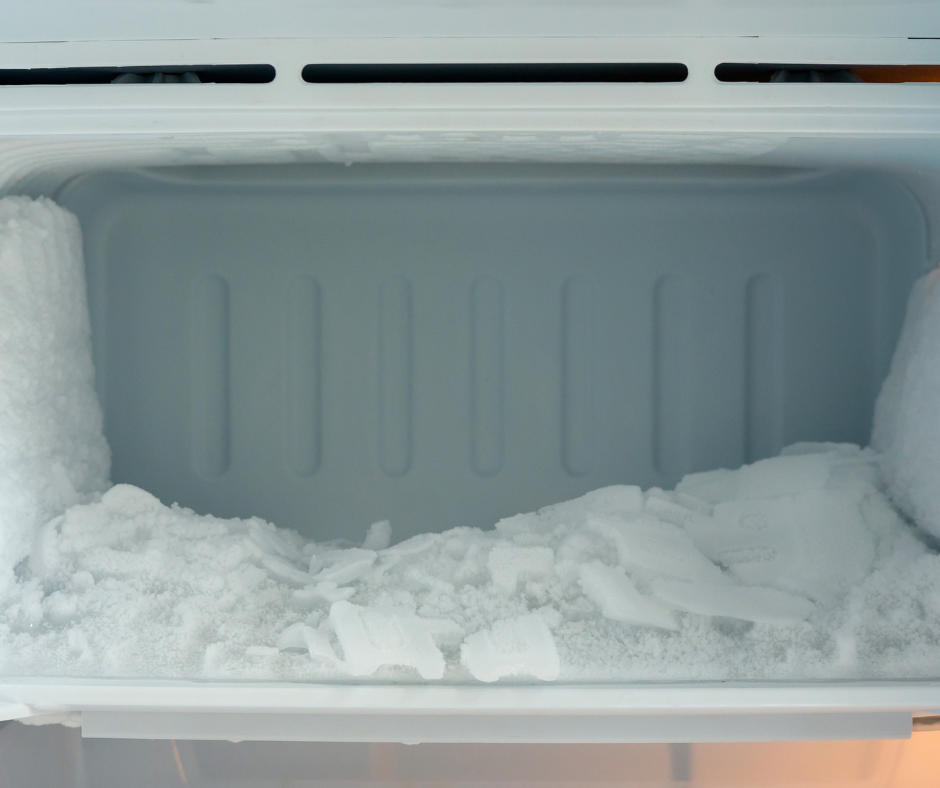
Leaking Ice Maker
A leaking ice maker can be a messy problem and even lead to ice clumps forming in the ice bin or dispenser chute. To address this problem, you can:
- Make sure that the fill cup is correctly positioned beneath the valve’s spigot.
- If you find ice clumps blocking the dispenser chute, you can use a long plastic or wooden handle, such as a spatula, to remove the blockage.
- Remove the ice bin if the clumps are too large or lodged.
- Place a towel and dish below the chute to allow the ice to thaw naturally.
An unbalanced refrigerator can also cause water to pool in the ice bin or travel beyond the designated area, so make sure your refrigerator is level to prevent any issues. Additionally, check the door gaskets and any other potential causes that may prevent the freezer from cooling adequately, as this can impact ice production.
Odd-Tasting Ice
No one enjoys ice with an unpleasant taste. Factors such as water quality and old food in the freezer can contribute to odd-tasting ice. Odors from food that has not been adequately packaged can be absorbed by the ice cubes, affecting their quality. Stale or contaminated ice can result from extended storage in the freezer, as it absorbs odors from the food stored in the refrigerator or freezer.
Typical contaminants that cause unpleasant-tasting ice include:
- Contaminated tap water
- A dirty water filter
- Chemicals or impurities in the water
- Strong-smelling foods stored in the refrigerator
Avoiding odd-tasting ice requires a good-quality water source, given that water can exhibit various flavors and qualities based on its origin.
Step-by-Step Ice Maker Troubleshooting Guide
Having covered the common ice maker problems, we’ll now proceed to a detailed troubleshooting guide to help you address these issues.
The following subsections will provide detailed instructions on checking the water supply, resetting the ice maker, and adjusting temperature settings.
Checking the Water Supply
Before inspecting your ice maker, you need to confirm that the water supply is operating correctly. To do so, follow these steps:
- Close the shut-off valve in the waterline leading to the water valve.
- Access the water valve by removing the lower access panel on the back of the refrigerator.
- Plug in a ‘cheater’ power cord to the solenoid of the water valve.
- Listen for its operation – if it’s working, you should hear it.
Next, ensure the water supply line is connected to a cold water supply and that the water shutoff valve is fully opened. To check if water flows from the end of the water supply line, place the end of the line in a bucket and briefly open the cut-off valve.
Finally, confirm that the water dispenser and refrigerator ice maker are functioning correctly by pushing the refrigerator back into place. If you still encounter issues, you may need to consult a professional for further assistance.
Resetting the Ice Maker
A reset of your ice maker can address a range of common problems, including incorrect temperature settings, expired water filters, and issues with ice not dropping or being too small. To reset different types of ice makers, you may need to press and hold the OFF button for 3 seconds, remove the front cover of the ice machine, press down the ice feeler arm three times in succession, adjust the feeler arm, press the reset button, use the on/off switch, unplug the refrigerator, or cycle the feeler arm up and down multiple times.
Keep in mind that you should only reset your ice maker once while attempting to diagnose the issue. If resetting the ice maker doesn’t resolve the problem, you may need to consult a professional for further assistance.
Adjusting Temperature Settings
The role of temperature settings in ice production is crucial. Ensure your freezer is set to 0°F (-18°C) and your refrigerator is between 33–40°F (0–4°C) for optimal ice maker performance. If you find that your freezer is not maintaining the required temperature, look for a temperature control dial and adjust it to a setting close to 0° Fahrenheit.
It’s also important to note that fluctuations in freezer temperature can have a detrimental effect on the operation of your ice maker. Maintaining a consistent and suitable temperature in the freezer ensures optimal ice maker performance and prevents potential issues.
Preventive Maintenance for Your Ice Maker
Aside from essential troubleshooting, practicing preventive maintenance is key in keeping your ice maker running smoothly. In the following subsections, we’ll discuss regular filter replacements, cleaning the ice bin, and monitoring freezer temperatures to ensure your ice maker stays in tip-top shape.
Regular Filter Replacements
Maintaining your ice maker’s performance necessitates regular filter replacements. It’s recommended to replace the refrigerator water filter every 6 months to a year, depending on your specific refrigerator’s guidelines. This prevents issues such as:
- Reduced or absent water flow to the ice maker
- Murky or unclean ice
- Peculiar taste or smell in the ice or water
- A slow trickle of dispensed water
- Ice with an unusual odor
By ensuring your water filter is up to date, you not only maintain your ice maker’s performance but also guarantee that your ice retains its intended taste. Don’t underestimate the power of a clean filter!
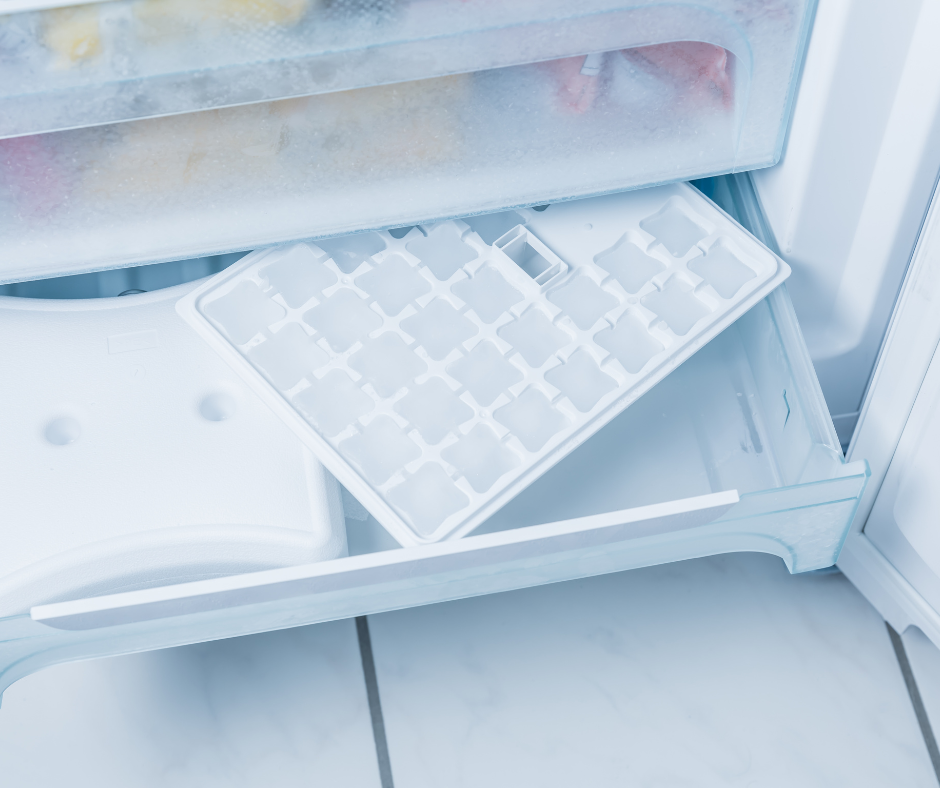
Cleaning the Ice Bin
Regularly cleaning the ice bin is imperative to prevent contamination and uphold the quality of your ice. To clean the ice bin, follow these steps:
- Turn off the ice maker and remove the bin.
- Hand wash the bin with warm water, soap, and a clean sponge.
- Thoroughly rinse the bin to remove any soap residue.
- Allow the ice bin to air dry completely before placing it back in the ice maker.
Regular cleaning of the ice bin ensures the highest quality ice for your household or customers. Don’t let dirty ice ruin your refreshing beverages – keep that ice bin sparkling clean!
Monitoring Freezer Temperatures
Monitoring your freezer temperatures is necessary to guarantee optimal ice production and ward off potential issues. The optimal freezer temperature for an ice maker to operate effectively is between 0 and 5 degrees Fahrenheit. To monitor your freezer’s temperature, use a thermometer specifically designed for freezers and place it in the center of the freezer for an accurate reading.
It’s recommended to assess your freezer’s temperature on a monthly basis to ensure optimal ice production. By maintaining proper freezer temperatures, you’ll keep your ice maker operating at peak performance, ensuring you always have plenty of ice on hand.
When to Call a Professional for Ice Maker Repair
Sometimes, despite your best troubleshooting efforts, you may still encounter issues with your ice maker. In the following subsections, we’ll discuss when it’s time to call a professional for ice maker repair, including persistent issues after troubleshooting, signs of faulty components, and complex repairs beyond DIY capabilities.
Persistent Issues After Troubleshooting
If you’ve tried all the troubleshooting tips provided in this guide and still face refrigerator ice maker problems, it may be time to call a professional. For example, if you’ve identified a problem with the water line in your home or the intake valve on your refrigerator, you’ll need expert assistance to resolve these issues.
If your ice maker not working despite your troubleshooting efforts, don’t hesitate to turn to professional assistance. A skilled technician can diagnose and repair the problem, ensuring your ice maker is back to working properly in no time.
Signs of Faulty Components
Determining when to call a professional for ice maker repair hinges on your ability to recognize signs of faulty components. If your ice maker is experiencing any of the following issues, it may indicate defective components:
- Not producing ice
- Producing small or hollow ice cubes
- Leaking
- Producing ice with an unusual taste
To determine whether your ice maker’s thermostat is faulty, you can use a multimeter to test for continuity. If continuity is not detected, the thermostat may need to be replaced.
By identifying signs of faulty components, you can ensure that you seek professional help when it’s necessary, ultimately saving time and frustration in the long run.
Complex Repairs Beyond DIY Capabilities
Certain ice maker repairs surpass the capabilities of a DIYer, necessitating the expertise of a professional technician. Complex repairs, such as:
- a frozen ice maker
- the unit not turning off
- a clogged water line
- issues with ice not ejecting
are best left to the experts.
Attempting DIY repairs on complex ice maker issues can be risky and often lead to:
- Complications
- Safety hazards
- Warranty voidance
- Lack of expertise
- Costly errors
When in doubt, it’s always best to consult a professional for assistance.
Summary
In this guide, we’ve covered common ice maker problems and provided step-by-step troubleshooting tips along with preventive maintenance practices to keep your ice maker running smoothly. Don’t let a malfunctioning ice maker ruin your day – with this guide, you’re well-equipped to tackle any ice maker issue that comes your way. Stay cool, and enjoy your perfectly chilled beverages!
Frequently Asked Questions
How do I get my ice maker to work again?
Check the control arm and power switch, ensure correct installation, replace or clean the water filter, check for adjustable water flow, inspect freezer temperature, unthaw the water intake, and inspect the valve and home water line to get your ice maker working again.
How do I reset my ice maker?
Unplug your ice maker, wait 10 seconds, and plug it back in with the ON button pressed. You should then see a blue light, indicating that the reset is complete.
Why is my ice maker not making ice but water works?
It appears that your ice maker is not making ice because the water inlet valve requires a minimum of 20 psi to operate correctly, and there may be a lack of water pressure present.
How often should I clean my ice bin?
It is recommended to clean your ice bin at least every three months, though depending on usage and location, you may need to do it more frequently.
How can I adjust the water flow control for my ice maker?
Adjust the water flow control on your ice maker to ensure proper ice cube formation and the desired quantity of water.
[ad_2]
Source link