[ad_1]
Picture this: you open the freezer, excited for a refreshing glass of ice-cold water, but the ice maker has other ideas. It’s making ice, but it’s not dispensing any. What could be causing this mysterious problem, and more importantly, how can you fix it? Fear not, dear reader, as this comprehensive troubleshooting guide will delve into the enigma of an ice maker making ice but not dumping, and help you resolve this issue.
Key Takeaways
- Maintaining a consistent freezer temperature and regularly checking for clumps are key strategies to ensure efficient ice production.
- Regular cleaning, inspection, and replacement of filters/parts are essential for proper maintenance & care of an ice maker.
- Diagnose ejector & dispenser assembly issues with a systematic approach. Seek professional help when necessary.
Ice Maker Is Not Working
If you’ve found that your ice maker is not working, troubleshooting the issue can save you time and money. There are several common reasons for this problem. First, check if the water supply to the ice maker is functioning correctly. Sometimes, a blocked water line or a faulty water inlet valve can be the culprits. Additionally, make sure the ice maker’s thermostat is set to the right temperature. If your freezer is too warm, it can hinder ice production. Lastly, inspect the ice maker’s electrical connections and the ice mold for any damage or obstructions. By systematically addressing these potential issues, you can often resolve the problem of your ice maker not working.
The Ice Maker Conundrum: Common Causes and Solutions
Although it may seem like your ice maker is acting out of its own volition, common issues like freezer temperature and ice tray blockages are usually the culprits. Normal operation can often be restored by adjusting the temperature and clearing any blockages. Knowing these potential causes and their solutions will ensure you can enjoy a constant supply of fresh ice cubes whenever you need them.
Understanding the general maintenance and care needed for your ice maker is crucial before we delve into specific issues. Consistent cleaning, inspection, and replacement of filters and components, such as the ice maker mold thermostat, will keep your ice maker in top condition. With that in mind, let’s explore some common ice maker problems and their solutions.

Freezer Temperature Issues
Freezer temperature significantly impacts the ice maker’s performance, particularly when ice trays are frequently refilled. The optimal temperature range for the refrigerator is 33-40°F (0-4°C), and the freezer should be set to 0°F (-18°C). Maintaining these temperatures ensures that the ice cubes catch properly in the ice maker and are ejected efficiently.
Temperature issues can be resolved by simply adjusting the freezer’s thermostat to the proper temperature. After adjusting, wait for about 24 hours before checking the ice maker’s performance again. This will allow enough time for the ice maker and inlet tube to thaw.
Once the temperature is correctly set, your refrigerator ice maker should resume effective ice production and dispensing.
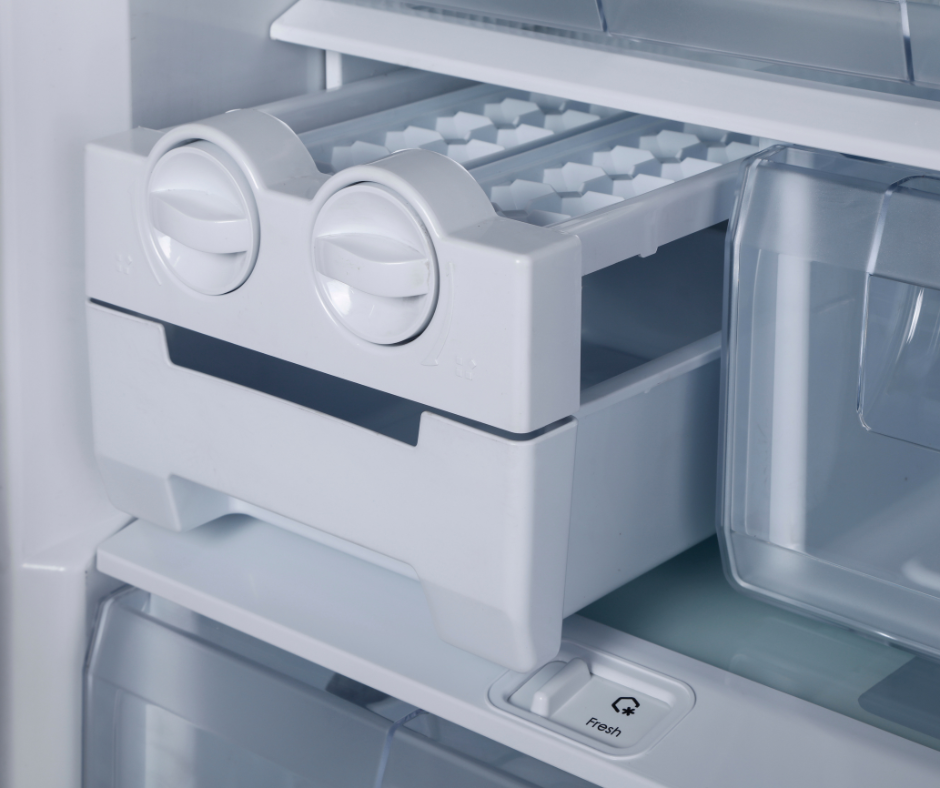
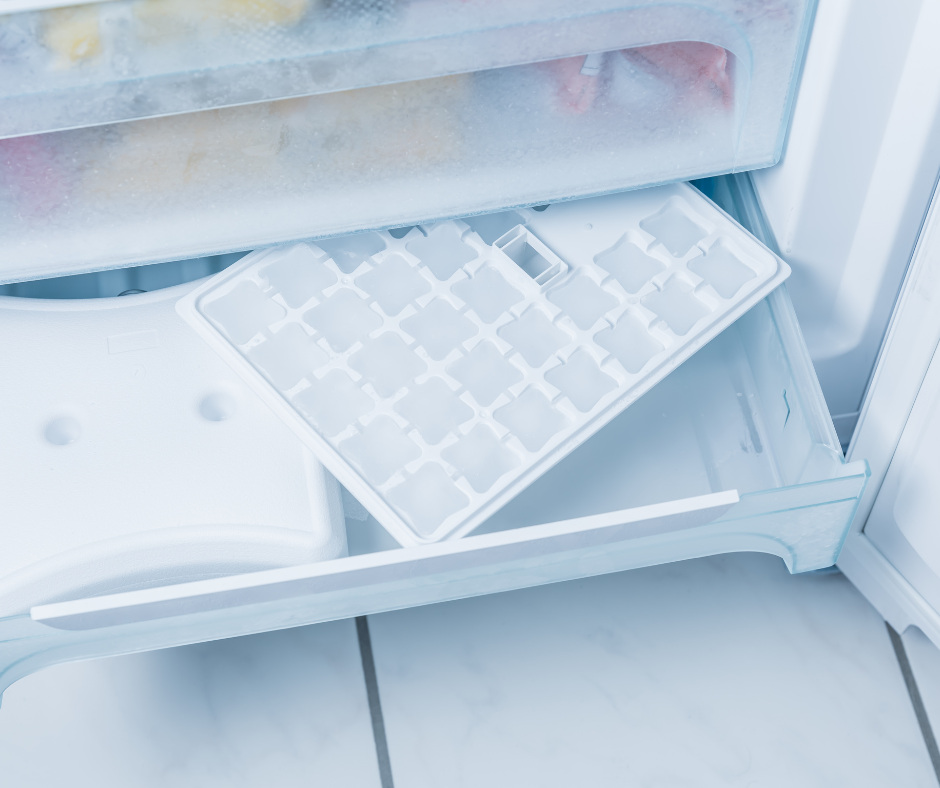
Ice Tray Blockages
Another frequent deterrent to ice dispensing is blockages in the ice tray. Blockages can be caused by constantly refill ice trays, as well as:
- Low water pressure
- A freezer compartment thermostat set too low
- Clogged or leaking water lines
- Frozen water in the line
- Ice stuck in the ice mold tray
Removing the blockage in the ice maker tray should address the problem.
To remove ice blockages, you can use various tools, such as a lever-equipped ice cube tray, which allows you to gently break the ice and remove it without bending or pushing. Once the blockages are removed, the ice maker should resume normal operation, dispensing ice as needed.
Handling Ice Clumps and Chunks
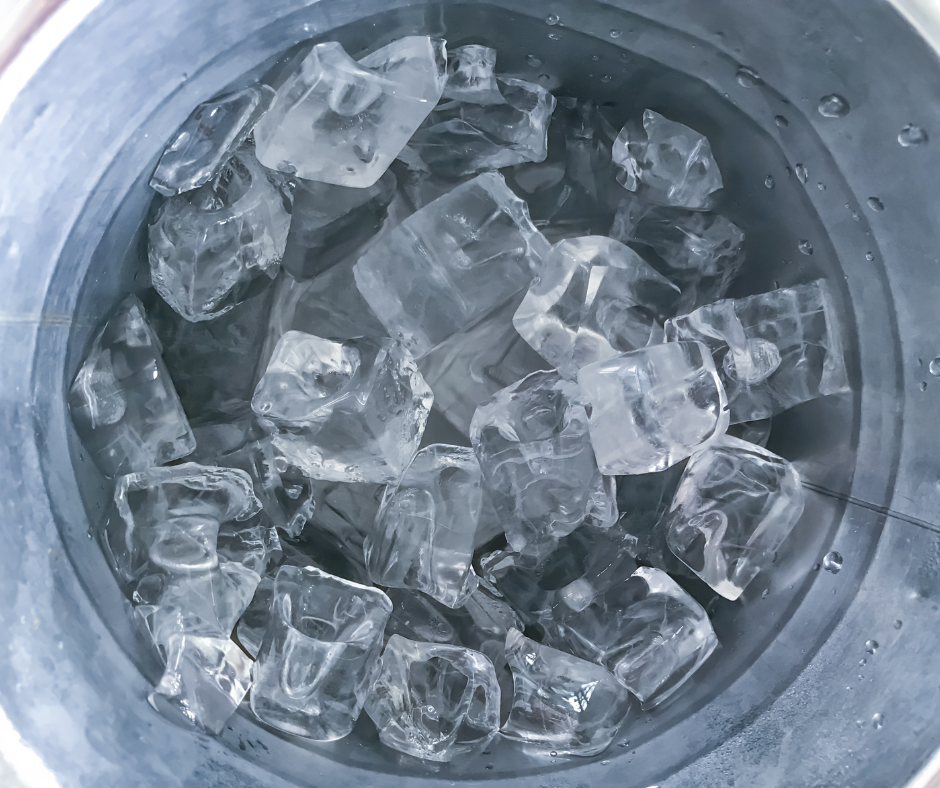
Your ice maker can also experience issues due to ice clumps and chunks. They form when several ice cubes refreeze together, creating a large ice clump that inhibits the passage of other ice cubes. In this section, we’ll look at how to remove these pesky ice clumps and prevent ice chunk formation, ensuring a smooth ice-making process.
Maintaining an appropriate freezer temperature and limiting door openings can help prevent the formation of ice chunks. Regularly checking the ice bin for clumps and removing them is also essential to ensure the ice maker functions efficiently.
Removing Ice Clumps
You can break up ice clumps in the ice bucket using a plastic or wooden handle, like a spatula, particularly for hard-to-reach areas. If the clumps are too large or stuck, the ice bin can be removed and defrosted, or if the ice is stuck in the dispenser, place a towel and dish beneath the chute to allow the ice to thaw gradually. This way, you can avoid the hassle of making ice again.
Regularly inspecting your ice maker for ice clumps and removing them when necessary can ensure your ice maker functions efficiently and produces clean ice. This simple maintenance task can make all the difference in your ice maker’s performance.
Preventing Ice Chunk Formation
Preventing ice chunk formation is as simple as maintaining the proper freezer temperature and avoiding frequent door openings. Keeping the freezer temperature at 0°F (-18°C) helps reduce the chances of ice chunks forming.
Frequent door openings allow warm and humid air to enter the freezer, causing condensation and ice chunk formation. By minimizing door openings and maintaining the right temperature, you can keep ice chunks at bay and ensure your ice maker continues to dispense ice efficiently.
Ice Maker Not Making Ice But Water Works
If you find yourself in a situation where your ice maker not making ice but water works, you’re not alone. This common issue can be frustrating, but there are several potential reasons for it. One possibility is a problem with the ice maker’s motor or components responsible for ice production. It could also be due to a clogged water line or a malfunctioning water inlet valve. In some cases, insufficient water pressure might be the culprit. Troubleshooting the issue step by step can help you identify and resolve the problem, ensuring your ice maker gets back to producing ice as it should.
Dealing with a Clogged Dispenser

A clogged ice dispenser can be frustrating, especially when you’re craving a cold drink. This section delves into identifying blockages in the dispenser system and clearing the clog, ensuring your ice maker is operational again.
By inspecting the ice chute and raker arm, you can identify dispenser blockages and take appropriate action to clear them. Let’s dive into the specific steps for dealing with dispenser blockages.
Identifying Dispenser Blockages
To identify dispenser blockages, follow these steps:
- Inspect the ice chute for any signs of obstruction.
- Check the raker arm for any blockages.
- If you find any obstructions, clear them to restore your ice maker’s ability to dispense ice.
Clearing the Clog
Once you’ve identified the blockage, it’s time to clear the clog. Manually remove ice chunks from the dispenser system, or use a tool such as a wooden spoon or a blunt object to dislodge stuck ice.
If the blockage persists, follow these steps:
- Disconnect the water line connected to the dispenser.
- Add 3-4 cups of vinegar and let it soak for 5-10 minutes.
- After the soak, inspect the hole or chute where the ice travels and remove any fused ice pieces.
- Reconnect the water line.
- Test the dispenser to ensure the clog has been cleared.
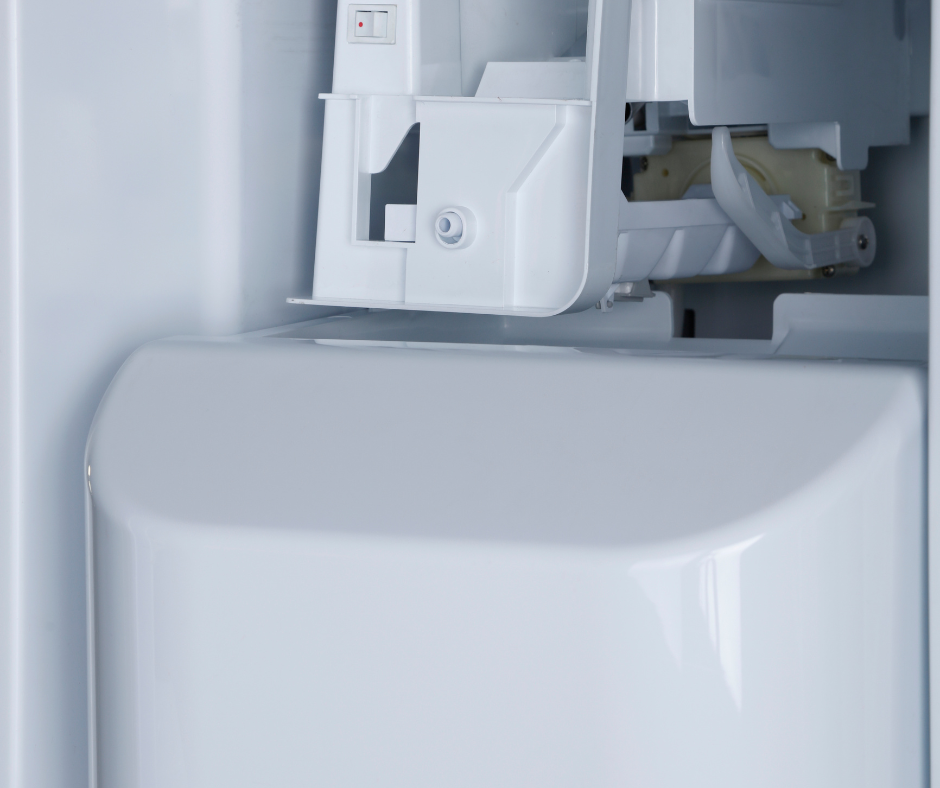
Auger Motor Troubles and Solutions

The auger motor, a critical component of your ice maker, facilitates the movement of ice from the bin to the dispenser. Unfortunately, it can also malfunction, causing issues with ice dispensing.
In this section, we’ll discuss solutions for dealing with auger motor troubles, ensuring your ice maker continues to operate smoothly. By identifying the specific issue with the auger motor, you can implement the appropriate solution, whether it’s thawing a frozen motor or replacing a malfunctioning one.
Thawing a Frozen Auger Motor
A frozen auger motor can be thawed by depressing the dispenser lever, which activates the generator motor and effectively melts the ice obstructing the auger motor. Alternatively, you can use a hairdryer to melt any stuck ice around the motor.
When using a hairdryer, follow these steps to avoid overheating the motor:
- Hold the hairdryer a few inches away from the motor.
- Direct the warm air toward the motor, moving it back and forth to evenly distribute the heat.
- Once the motor is thawed, test it to ensure it’s functioning correctly.
Replacing a Malfunctioning Motor
If the auger motor is malfunctioning and cannot be thawed, it’s time to replace it. To replace the motor, follow these steps:
- Remove the ice bin assembly.
- Locate and remove the motor cover.
- Disconnect any wires connected to the motor.
- Remove the motor from its housing.
- Install the new motor.
- Reconnect any wires.
- Replace the motor cover.
- Put the ice bin assembly back in place.
By replacing a malfunctioning auger motor, you can restore your ice maker’s functionality and continue enjoying a steady supply of ice.
Ejector and Dispenser Assembly Issues
Problems with your ice maker can also arise from ejector and dispenser assembly issues. These problems typically involve wear or damage to components. In this section, we’ll discuss how to diagnose and address ejector and dispenser assembly problems to ensure your ice maker is back in working order.
By inspecting components for wear or damage, you can diagnose assembly issues and take the necessary steps to repair or replace faulty components.
Diagnosing Assembly Problems
To diagnose ejector and dispenser assembly issues, follow these steps:
- Inspect the components for any signs of wear or damage.
- Conduct a thorough inspection of the ice maker assembly to identify the root cause of any issues.
- Determine the best course of action for repair or replacement.
By identifying the specific problem with your ice maker’s assembly, you can implement the appropriate solution to restore your ice maker’s functionality and continue enjoying a steady supply of ice.
Repairing or Replacing Components
When you’ve identified the faulty components in the ejector and dispenser assembly, the next step is to repair or replace them. In some cases, the components can be repaired, while in others, replacement may be the best option.
If you’re unsure how to repair or replace the components, it’s wise to seek the assistance of a professional appliance repair team to evaluate the issue and determine a suitable solution. This will ensure your ice maker is properly repaired and continues to provide you with ice when you need it.
Proper Ice Maker Maintenance and Care

Proper maintenance and care of your ice maker are necessary to prevent issues and prolong its lifespan. Proper maintenance and care include regular cleaning and inspection, as well as replacing filters and parts as necessary to ensure optimal performance.
By adhering to these maintenance and care protocols, you can ensure your ice maker continues to produce clean, untainted ice for you to enjoy.
Regular Cleaning and Inspection
For the proper functioning and longevity of your ice maker, regular cleaning and inspection are vital. Keeping the ice maker clean and free of obstructions can help prevent issues like blockages, ice clumps, and chunks.
To clean and inspect your ice maker, make sure to use appropriate tools and materials, such as:
- Heavy-duty rubber gloves
- Soft nylon brushes
- Sponges or cloths
- A bucket
- Warm water
- Dish soap
- Baking soda
- Ice machine cleaner, such as Affresh ice machine cleaner or distilled white vinegar
Regular cleaning and inspection can keep your ice maker running smoothly and producing clean, safe ice.
Replacing Filters and Parts
Another integral aspect of ice maker maintenance and care is replacing filters and parts as necessary for both individual ice maker units and larger ice makers. Worn-out filters can result in strange-tasting ice, and outdated filters or unclean ice maker components can cause peculiar flavors in the ice.
To maintain optimal ice maker performance, replace the water filter every six months. This will ensure you continue to enjoy clean, fresh-tasting ice from your ice maker.
Amana Ice Maker Not Working
If you’ve found that your Amana ice maker not working as it should, troubleshooting the issue is the first step to enjoying ice-cold refreshments once again. Amana ice makers are known for their reliability, but like any appliance, they can encounter problems. Before calling for professional assistance, there are some common issues you can check to get your Amana ice maker back in perfect working order
Summary
In conclusion, solving the mystery of an ice maker making ice but not dispensing it involves identifying and addressing common issues, such as freezer temperature, ice tray blockages, ice clumps and chunks, clogged dispensers, auger motor troubles, and ejector and dispenser assembly problems. By following the troubleshooting tips and maintenance advice outlined in this guide, you can ensure your ice maker continues to function efficiently and provide a steady supply of ice for years to come.
Frequently Asked Questions
Why does my ice maker make ice but not dump it?
It appears that your ice maker is making ice, but it is not dropping due to a blockage in the tray or an ice cube jammed between the bin and the lever. To unjam the ice tray, most DIY experts recommend pouring a cup of hot water into the frozen-up ice maker tray. If the issue is ice lodged in the dispenser, jiggle the cubes free or place a catch under the dispenser and give the ice time to melt on its own. These issues indicate a mechanical or electrical problem, rather than a water supply issue.
How do you force an ice maker to dump ice?
To force an ice maker to dump ice, power-cycle the ice maker, empty and clean the bin, inspect the water line and replace the water filter, then pull off the ice maker cover and connect the common and harvest terminals with a short piece of wire. Wait a few minutes and the unit should cycle through and eject the frozen cubes.
What is the proper freezer temperature for optimal ice maker performance?
For optimal ice maker performance, the freezer temperature should be set at 0°F (-18°C).
How can I remove ice tray blockages in my ice maker?
Gently break up and remove the ice blockage using a lever-equipped ice cube tray or wooden spoon.
How do I thaw a frozen auger motor in my ice maker?
Depress the dispenser lever or use a hairdryer to melt stuck ice to thaw a frozen auger motor in your ice maker.
[ad_2]
Source link